Authentication
Register with a phone number or log in with your existing Blink account on the Blink dashboard at dashboard.blink.sv
Use the same credentials as with the Blink wallet app
Create an API key
- Select API Keys in the menu on the left
- Create an API key with the
+button
Scopes
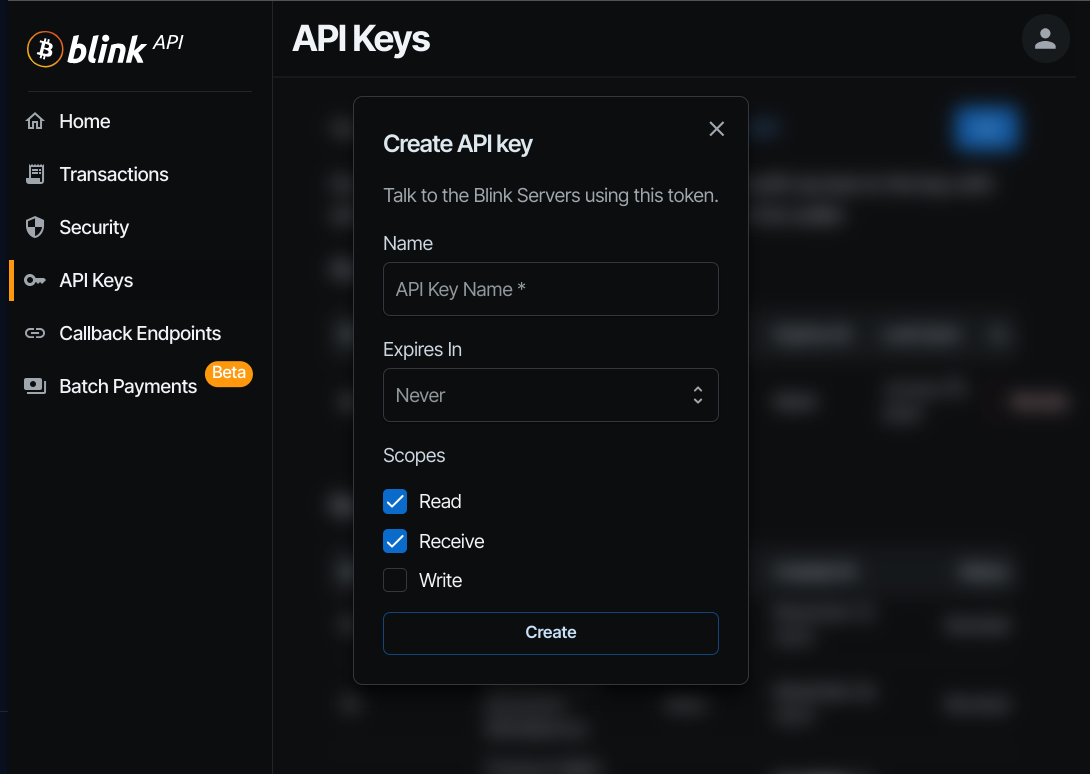
Read
- Allows queries returning user info, wallet balance, transaction history and other features.
Receive
- Allows to create invoices and generate onchain addresses.
- Note that there are methods to create invoices without authentication with a stricter rate limiting applied.
Write
- Allows to send payments and modify user data.
- For security avoid using the
Writescope in third party servers as much as possible.
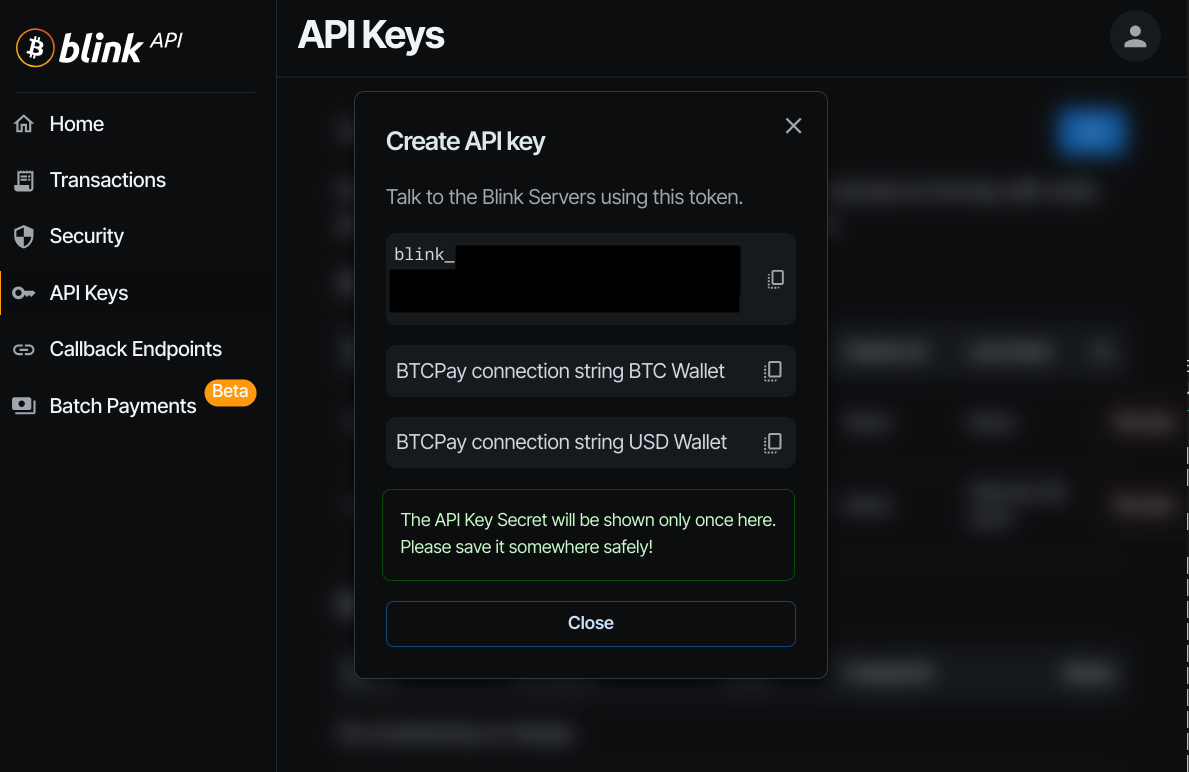
Saving the key
- Copy the API key and save it securely as a password.
- The BTCPay connection strings contain the same API key togethet with the ID of the chosen wallet in the format ready to be pasted in the BTCPay Server interface.
API Authentication
Need an unauthenticated flow? Start with No API Key Operations, then confirm the exact operation in the Public API Reference.
Never expose your API keys in client-side code (like frontend JavaScript) where they can be extracted by users. API keys should only be used in server-side applications where they remain private.
Be extremely cautious when sharing API keys with third-party services. Only share with trusted services and use the minimum required scope permissions for your use case. Consider using separate API keys for different integrations to limit exposure if a key is compromised.
Using the X-API-KEY Header
All authenticated API requests to Blink require the X-API-KEY header with your API key.
X-API-KEY: blink_...
Example with curl
curl --request POST \
  --url 'https://api.blink.sv/graphql' \
  --header 'Content-Type: application/json' \
  --header 'X-API-KEY: blink_your_api_key_here' \
  --data '{"query":"query me { me { defaultAccount { wallets { id walletCurrency }}}}"}'
Example with JavaScript fetch
This example is for demonstration purposes only. Never include API keys directly in client-side JavaScript code. For browser-based applications, make API calls through your own backend server that securely stores and uses the API key.
// This should only be used in a secure server-side environment, not in browser code
const response = await fetch('https://api.blink.sv/graphql', {
  method: 'POST',
  headers: {
    'Content-Type': 'application/json',
    'X-API-KEY': 'blink_your_api_key_here'
  },
  body: JSON.stringify({
    query: 'query me { me { defaultAccount { wallets { id walletCurrency }}}}'
  })
});
Resources
- Try the interactive API tutorial on the next pages
- The API endpoint is
https://api.blink.sv/graphql - Open the GraphQL Playground: api.blink.sv/graphql
- Check out the Blink API Postman collection
Create a new account in the dashboard
-
Open the Blink Dashboard
-
Click the
Sign in with Blink button
-
Click the
Register Herelink to create a new account using a phone number:
-
Create a new account on the next page:

-
There will be a captcha presented before sending a message to a phone number (there is no captcha when using an email to request the code):

-
Use the code from the SMS / Whatsapp or email (and your 2FA code is set) to complete the process

-
When the registration (or the log in) is completed you will find the Blink Dashboard with access to the wallet info, transaction history, API keys and other features.

Staging environment
For testing and development connect to the Blink Staging environment.
New registrations to the staging environment are currently limited. Please contact us on our Community Mattermost Server on chat.blink.sv to request access.
- Staging Dashboard: dashboard.staging.blink.sv
- Staging GraphQL playground and API endpoint: api.staging.blink.sv/graphql